


We have all seen the amazing things you can do with Ikea furniture. But this one might just be the easiest. Here’s how to take Ikea cabinets and give them a built-in custom look.
Ikea Cabinets Used:
These are the items for 1 locker bay. If you are building multiple, you will need to adjust the quantity.
- (1) Besta Cabinet 23″ x 75″
- (1) Besta Cabinet 23″ x 15″
- (1) Besta Shelf 22″ x 14″
- (1) Lappviken Door 22″ x 14″
- (2 pack) Besta Door Hinges
Assemble & Stack the Cabinets

This is a very simple configuration using 2 cabinets. The lower cabinet creates a cubby for a basket. (Side note: I choose to build a 4″ frame behind this cabinet, so it would extend out to create a “bench.” Totally not necessary!) The top cabinet is taller, and you’ll add a door and shelf which divides it into the open locker space, and upper enclosed cabinet.
- Assemble the cabinets
- Stack the 75″ cabinet on top of the 15″ cabinet
- Install the hinges and door at the top
- Install the shelf at the appropriate height
Adding Trim
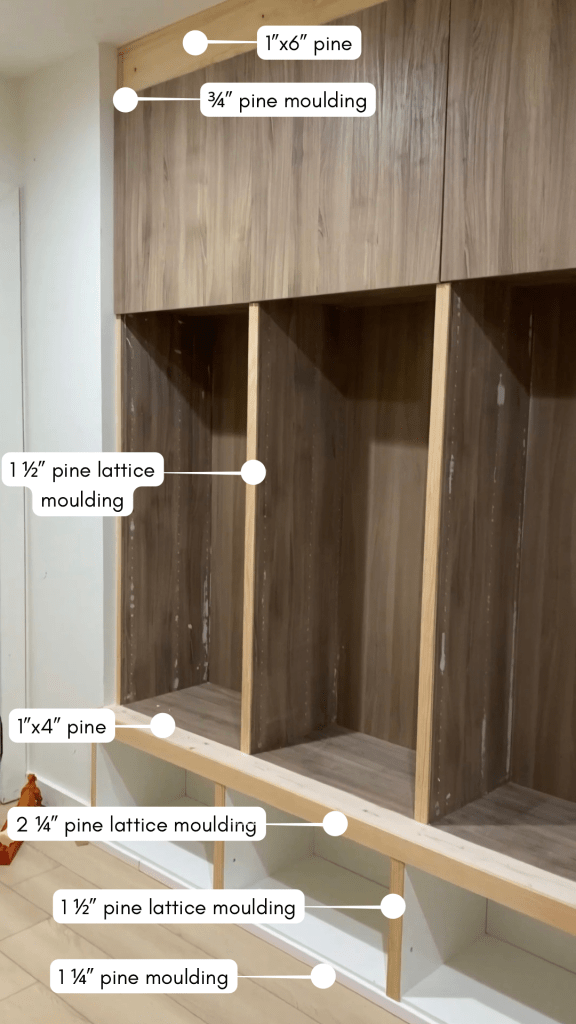
The trim is the key to a built-in look. You want to cover all gaps so it looks like one piece rather than individual pieces.
- Trim between the top of the cabinets and ceiling: 1″ x 6″ pine
- Trim between the ceilings and walls: 3/4″ pine moulding
- Trim between the upper cabinets: 1 1/2″ pine lattice moulding
- Trim between the lower and upper cabinet: 2 1/4″ pine lattice moulding
- Trim between the lower cabinets 1 1/2 pine lattice moulding
- Trim between the lower cabinet and floor: 1 1/4″ pine moulding.
- Optional bench: 1″ x 4″ pine
Painting

- Before painting, caulk between every seam, and the shelf holes in the cabinets
- Prime the cabinets with bin zissner bullseye 123. For the best results, I highly recommend a paint sprayer. Let dry 24 hours before painting.
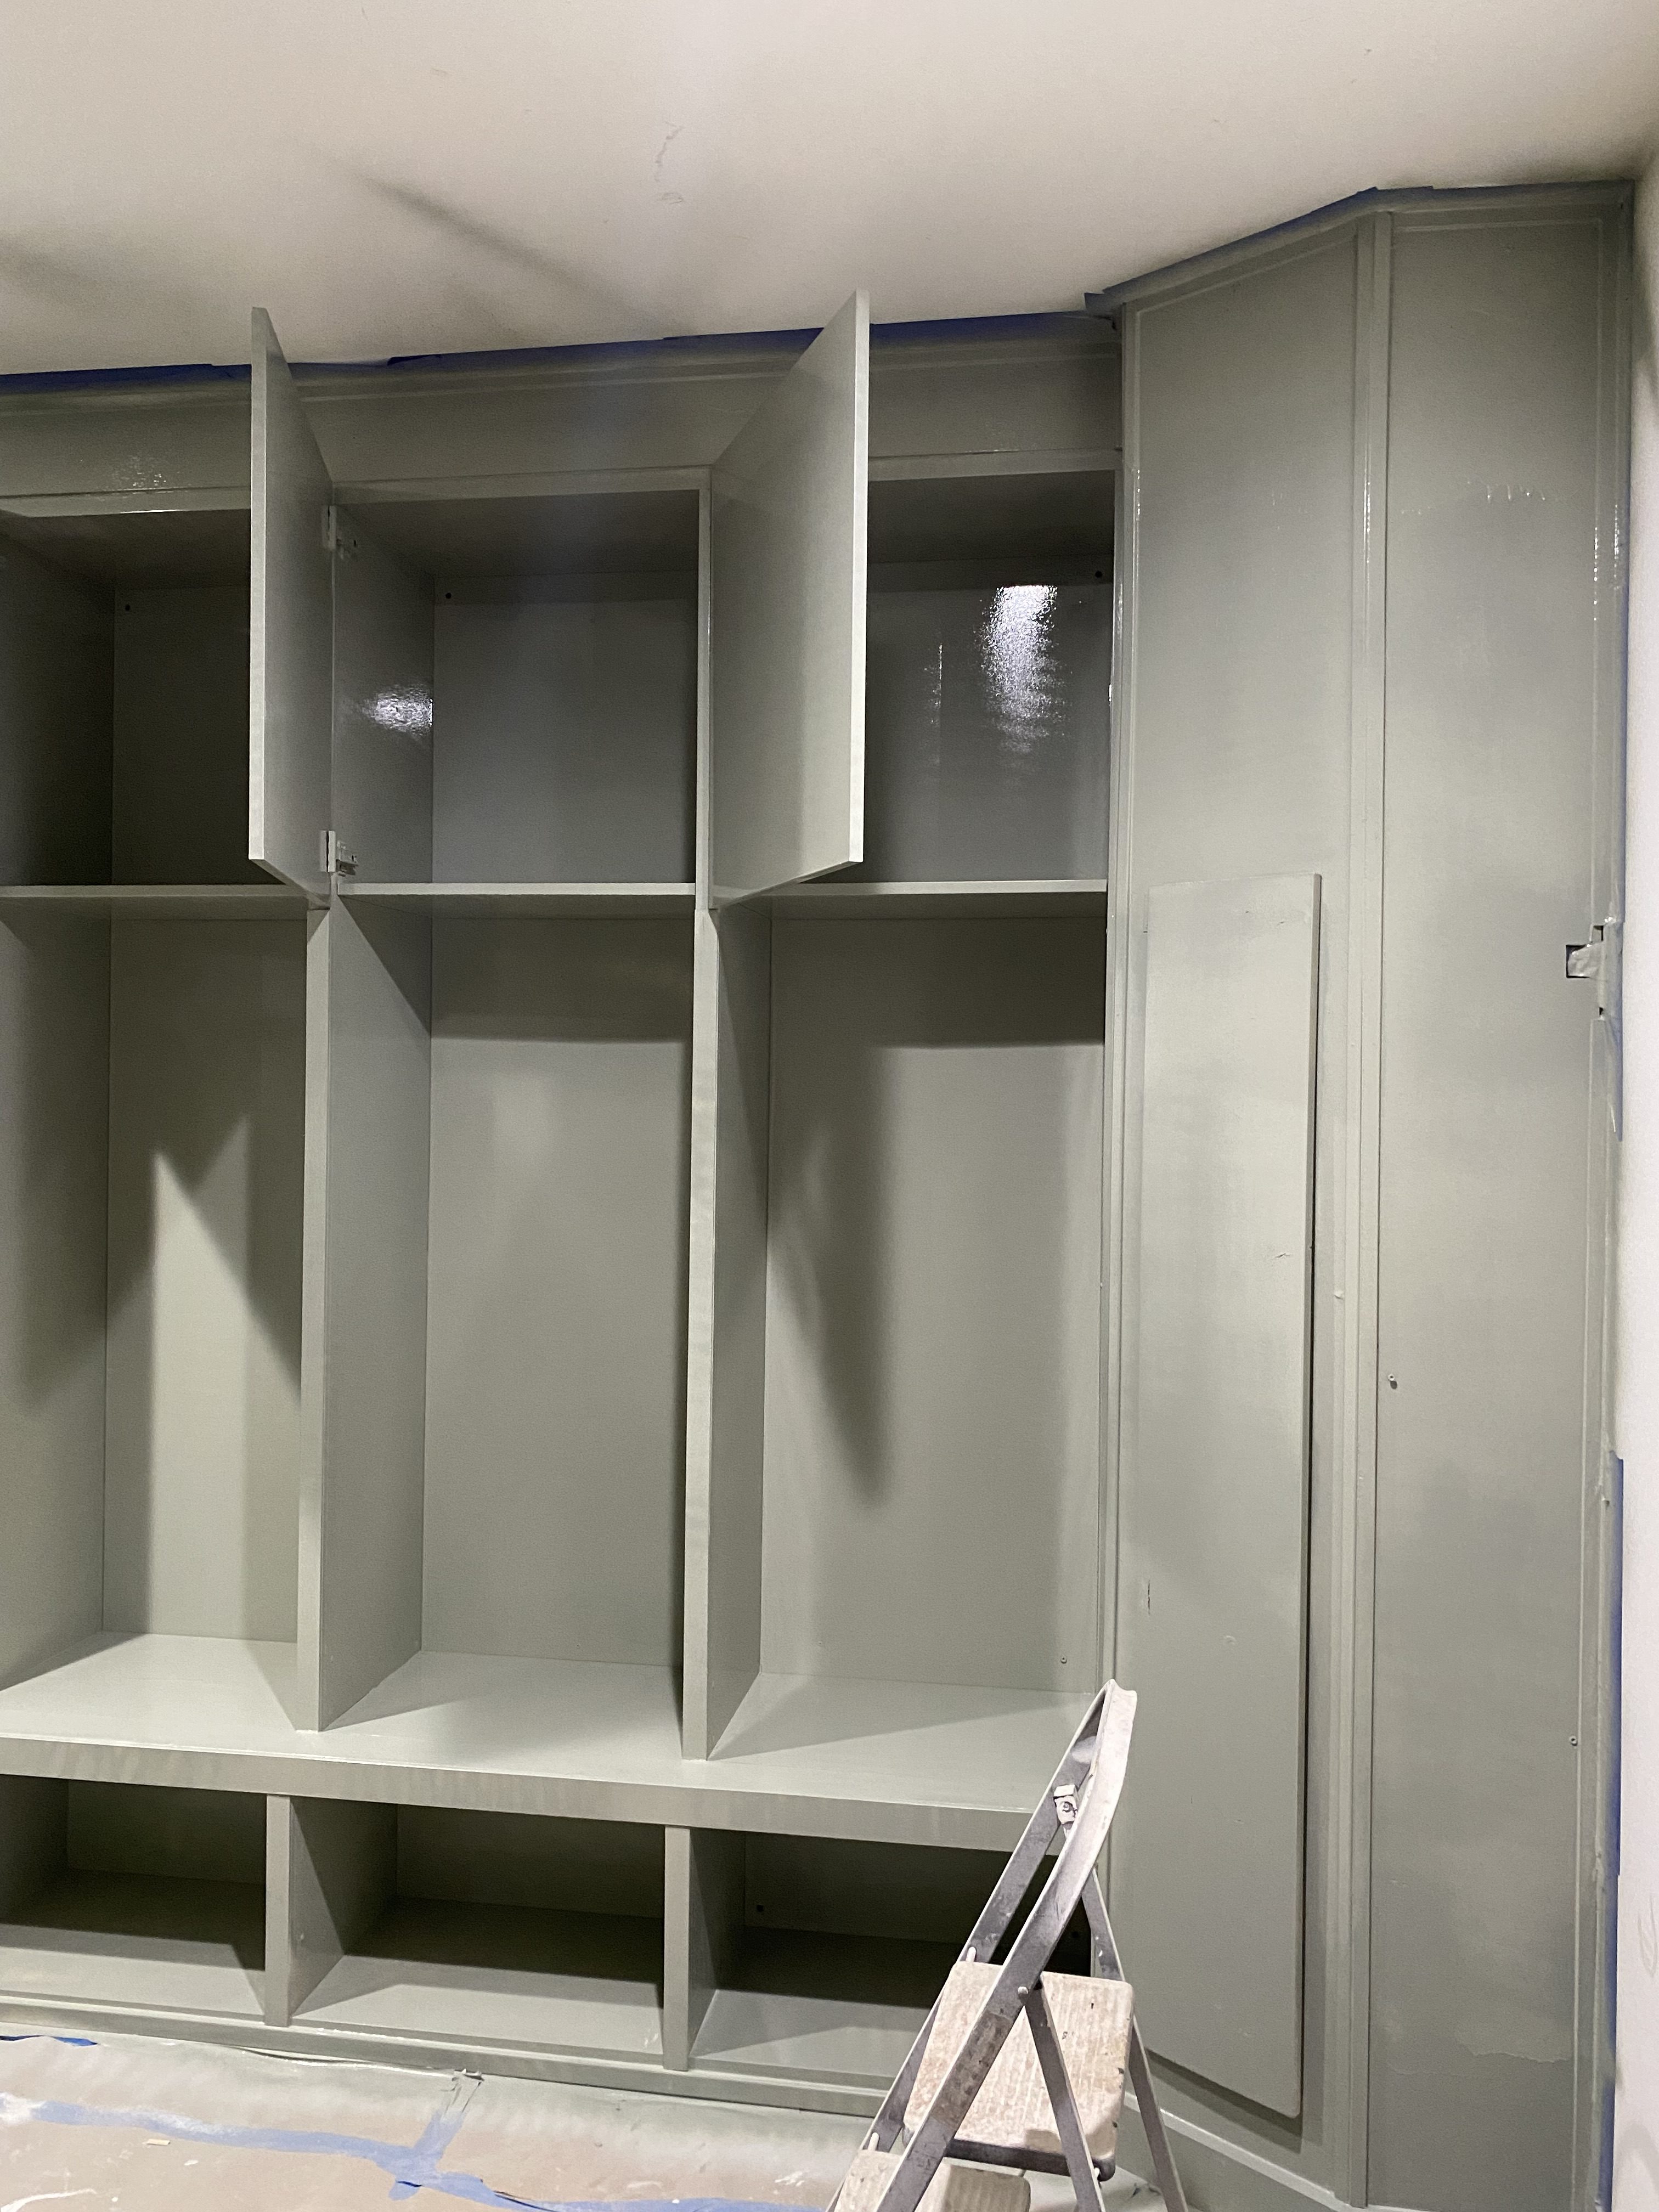
- Paint the cabinets, I highly recommend an enameled paint. The color I used is Sherwin Willians Evergreen Fog. I recommend doing 2 light coats rather than 1 heavy coat, letting it dry thoroughly in between.
- Paint a top coat for extra durability.
Final Touches
Use decor to reflect your personal style. Here are the items I used.

- Wallpaper
- Hardware
- Side Hooks
- Top Hooks
- Wire basket
- Fur seat cushion (actually a rug cut in half)
- Basket
I’ve had these lockers in my home for a few years now, and they’ve held up incredibly well. With three kids, they’ve become a true necessity for keeping everyday items organized while still looking nice in the space. They work just as well in an entryway, closet, hallway, or even a garage. The key to making them durable is using a high-quality primer and paint so the finish doesn’t chip over time. Soft baskets help prevent scratching, and adding hooks on both sides at different heights—plus along the top—maximizes every inch of hanging space.
I hope you find this information useful, and it fills you with confidence to take on this DIY! As always, I want to conclude by saying that I am not a professional. I am a DIY home renovator and designer and am sharing the things I have learned in my renovation journey. If you have specific questions, it is always best to consult a professional.
If you have any comments, feedback or questions I’d love to hear below!

Leave a Reply